Today, veteran podcaster & producer Steve Stewart joins us to talk about every Beginner podcaster‘s worst nightmare: EDITING AND PRODUCTION.
*shudders
Yes, podcast editing, audio engineering, etc, can scare many would-be podcasters…
But have no fear! We’re going to break this down into the bare essentials ????
We’ll quickly run through…
- What podcast equipment you actually NEED (and what is just “nice to have”)
- What editing software should beginners use? (Audacity? Logic? Audition?)
- The basic podcast editing techniques you MUST master quickly.
Let’s podcast!
You can also listen to me interviewing the podcast editing master, Steve Stewart:
Powered by RedCircle
or listen on Apple Podcasts \ Google PodcastsBefore we get started, don’t forget about my free podcasting webinar training! It’s a super handy resource for starting and launching–but there’s also a checklist you can follow every time you sit down to record 🙂
First, forget editing. You MUST know this first…
“First, I have to say: It’s not about the tech.” – Steve
I second this notion.
Nothing can replace interesting & remarkable content. No amount of editing, expensive mics, or ANYTHING will make up for “meh” content.
Producing content that matters to people is 10x more important than anything else in this article.
Internalize that.
Essential Podcasting Gear
Here’s a little-known secret (not really): 80% of getting a great-sounding podcast has NOTHING to do with editing–it has to do with the recording itself.
A decent mic w/ proper use + a quiet room + the right recording software = editing is 10x easier.
That said, let’s explore some of the pre-production essentials:
Mics
Steve and I BOTH recommend starting w/ the ATR-2100 ($60-70 on Amazon)
- It has fantastic sound
- The price is right
- It’s insanely durable
- Plug-n-play USB directly to your computer–OR XLR.
Beginner podcaster? 10-year vet? This is the ONLY essential mic I’m going to recommend. Period. Grab it.
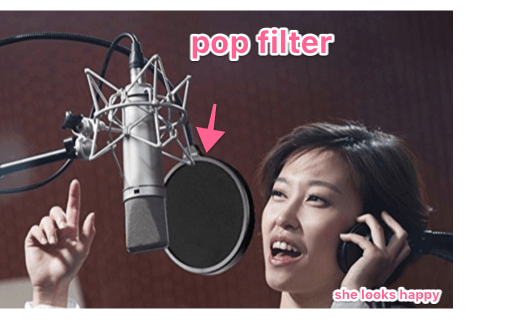
How necessary is a pop filter or windscreen?
Pop filter = a circle-shaped mesh thing that serves two purposes:
- Cuts out sharp mic sounds, including harsh “p’s.” (called “plosives”)
- Helps you keep a proper distance away from the mic
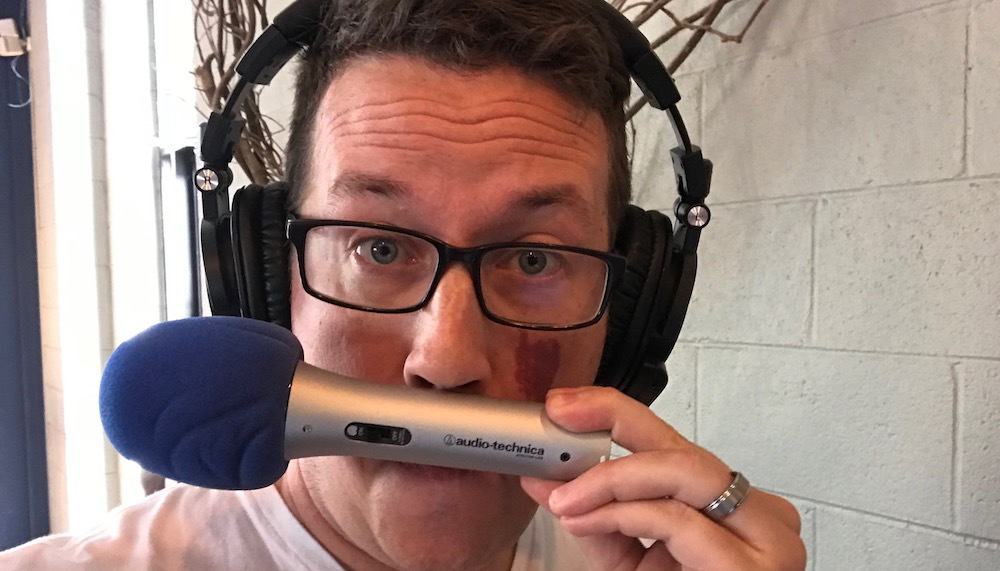
Windscreen = foam things you put on the end of the podcast.
Serves a similar function to pop-filters, and can help cut out wind noise (if outside), breathing noises, and maybe even a “plosive” or two.
See that blue thing on my ATR-2100 above?
That’s a windscreen I got on Amazon (I got a ton of them for $10)
In my quest to making podcasting DEAD simple and quick, I do not use a pop filter. It’s hard to travel with and the benefits it gives over my cheap windscreen is TINY. It doesn’t matter to me.
You might want to grab a mic stand.
I’m qualifying a mic stand as “essential,” as the stands most of these mics come with are terrible.
A boom stand is fine–but annoying to work with. I use the $35 Gator stand, and LOVE IT.
Nothing takes that bad girl down.
Pro tip: Here’s how to position and angle the microphone:
Note: This assumes you’re using a dynamic mic like the ATR-2100, Heil PR40, Shure SM48, Shure SM7B, etc.
- Keep the mic 2-4 inches away from your mouth,
- Pointed at an angle,
- Never turning your head away from the mic while talking.

If you were to shoot it like a gun, it should graze your mouth.
That’s it.
While recording interviews, you MUST wear headphones or earbuds.
If you don’t, the sound from your computer will bleed into the mic.
Any earbuds will do.
Though I’m loving the HECK out of my fancy ATH-50x, complete w/ Bluetooth attachment. (Same company that makes the ATR-2100 btw)
Other super-handy-but-non-essential podcasting gear:
Remember, these are the basics:
- decent mic w/ proper use
- quiet room
Once you have that, everything else only adds quality in small increments.
That said, here some ideas:
- a mixer to have more control over what goes in the mic (I’m buying this one soon)
- preamp (I got nothing here. I just know a few people use them)
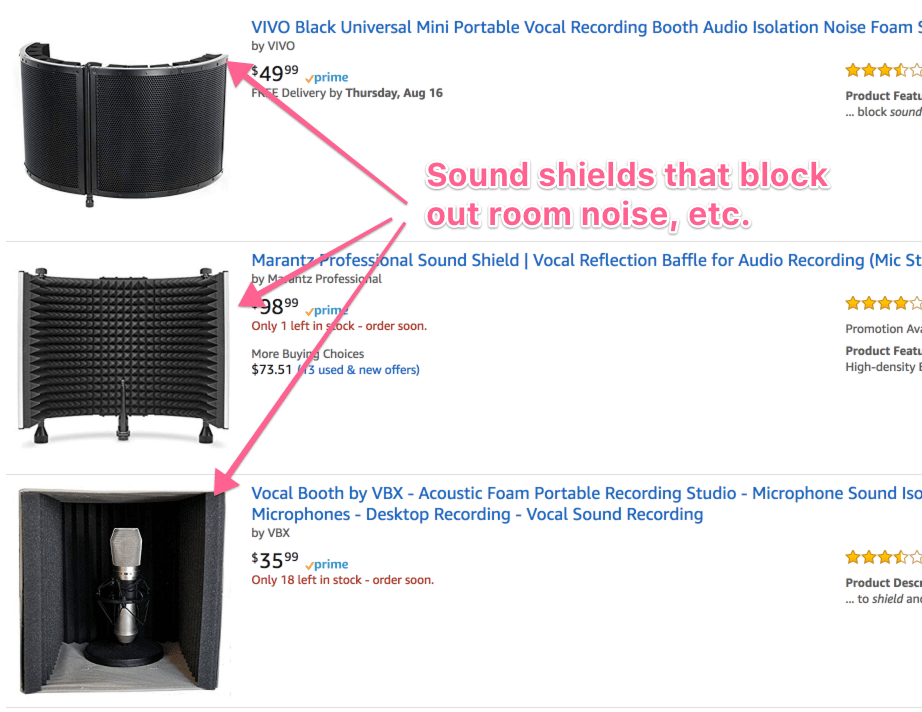
- sound barriers or “shields.” (these do a great job of absorbing sound).
You’ve probably seen foam sound panels on studio walls before–but they also sell desktop versions you can corner your mic with:
If you’re interested in seeing the rest of my gear, check out my blog bag equipment post here!
Let’s move on to software.
What software should you use to record podcast interviews?
First, if you’re just recording solo shows or voiceover intros/outros, etc–you can usually just record right in your editing software.
(Or using a digital recorder, like my Zoom H5)
For interviews, MOST people do 1 of 3 things:
- Use Skype + an addon to record
- Use Zoom (different company than the Zoom H5 mentioned above)
- Use Zencastr
Skype = Use Ecamm Recorder if you’re a mac user. It’s what I use–cheap and easy. Windows? Check these recommendations out.
Zoom = A GREAT platform for video/meeting calls. Way better than Skype–but the recorded audio quality is NOT as high as Skype’s. If you’re just doing audio recordings, stick to Skype. Video? Zoom maybe.
Zencastr = Free and Paid versions available! A browser-based software for recording interviews. I’ve heard nothing but great stuff about them–but I much prefer cheaper alternatives.

What software (DAW) should you use for podcast editing and post-production?
Psst. DAW stands for Digital Audio Workstation.
Remember: Which platform you choose matters LESS than choosing one and sticking with it!
Here’s a quick review of the most common programs:
Audacity – 100% free. Ugly. Works great & is all you actually need.
Adobe Audition – 100% PAID. Pretty and updated often. Works great but costs too much IMO.
Garageband – 100% free. Mac only. Does not have great tools and doesn’t do much.
Logic Pro – 100% paid, but a one-time fee. It’s GarageBand on steroids, and what I use! It’s also geared towards music. I love it 🙂
Hindenberg – 100% paid, but a one-time fee. I’ve never used it before.
Reaper – Both free and paid, and the paid version is CHEAP. Ugly, but simple and it works!
“Ok that’s great, Pete. But which one should we use??”
It doesn’t matter. All of the ones above can get your podcast sounding decent.
- If you’re looking to stay simple and free = use Audacity.
- If you have the Adobe CC suite already = use Audition.
- Wanna go paid, but starting small = try Reaper.
A beginner’s guide to podcast editing and mixing:
DYEB Tip: Your goal is not to be an NPR-sounding podcast. Your goal is to learn how to make your podcast “listenable,” then focus on improving the content itself. You can’t out-NPR NPR.
The 2 post-production “edits” a newbie podcaster needs to know:
- Noise reduction
- Loudness leveling
Nail these two things and your audio quality is already at 80%.
Here’s our objective:
AVOID really loud parts that hurt our listener’s ears–and AVOID really soft parts that they have trouble hearing.
We want to “level” that audio to make it more smooth: i.e. loud noises a bit softer, and soft noises a bit louder.
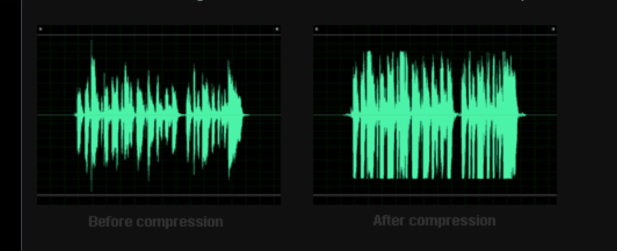
Image courtesy of Sound Quality Matters.
Just one problem…
If we don’t remove unwanted background noise–i.e. your air conditioner, police cars driving down your street, or the next room’s laundry running…
Any loudness leveler will BOOST that soft background noise (in an effort to smooth things out).
We don’t want that.
That’s why it’s important to work in order:
- Remove background noise
- Level audio.
1 – How to reduce background noise (in Audacity)
Bad news.
There are approximately 159 different ways to reduce background noise, and they’re often called something different in every DAW.
- Expanders
- Noise Reduction
- Speech Enhancer
- Noise Gates
These things can be found in almost every DAW out there. You don’t need a 3rd-party plugin or anything.
Below we’ll map out how to reduce noise in Audacity, but here are the best resources for other DAWs:
- Audition = this video or this video
- Garageband = this video
- Logic Pro = this old video is still relevant.
- Reaper = this article
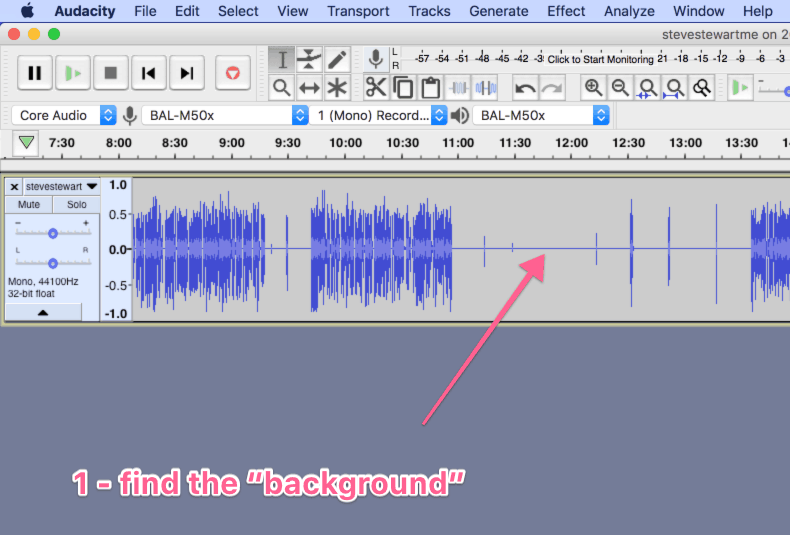
Here’s how to remove background noise in Audacity:
1 – find periods of silence in your recording (i.e. where the ONLY noise at that part is technically background noise.
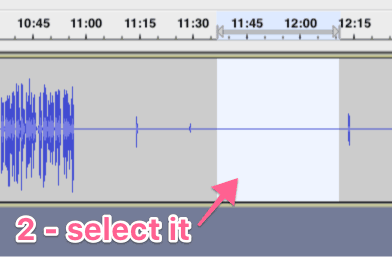
2 – Drag your mouse across the file and select background noise
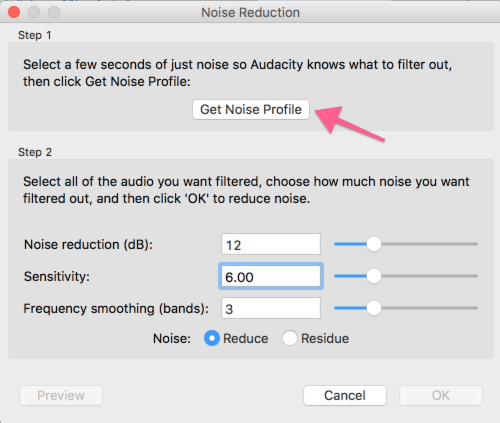
3 – click “noise reduction” under “Effect” menu item
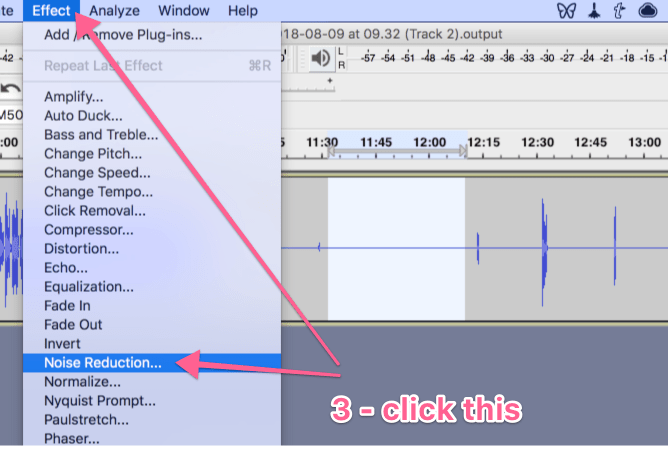
4 – Leave the settings at the default levels (unless you know what you’re doing. You can learn this later), click “get noise profile.”
This is looking at the background noise “sample” you selected.
5 – Highlight the entire track (Important) by pressing CMD/CTRL + A to select all, or by clicking the track’s box.

6 – Go to “Effect” again and click “Repeat Noise Reduction.”
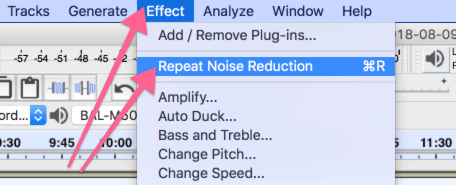
That’s it.
Will it be perfect? Nope.
Will it make a difference for now? Absolutely.
Here’s a video to help if you’re having trouble.
2 – How to adjust loudness to “level-out” your audio.
I used to use all of these to adjust my levels:
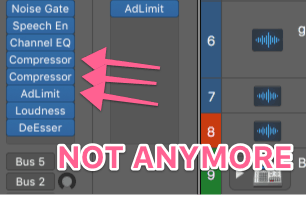
I had to go through these 3 effects and fine-tune for every track, every situation, etc.
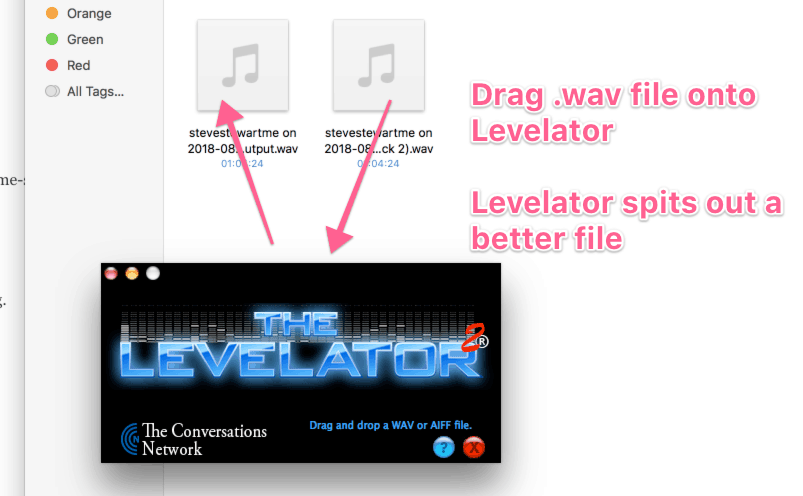
Now, I just use The Levelator.
Levelator is a 100% free download that allows you to simply drag-n-drop a .wav file onto it–and it levels the audio.
30% compressor, 30% limiter, 40% magic.
Here’s the process:
- Remove noise from your audio file FIRST.
- Export in .wav format (an uncompressed audio file. All DAWs can do this)
- drag that file onto Levelator
- Levelator spits back a new file in the same folder.
Despite the fact that this plugin looks old as heck–it still works really friggin well.
I have added this to my podcasting workflow, and the results have been fantastic (and time-saving).
A slightly beefier but paid version: Auphonic.
BTW – I have an Auphonic Leveler tutorial on the blog right here!
I’ve never used this, but Steve said it’s great, and I’d trust Steve with my–podcast editing.
Pro Tip: Always record and export interviews on split tracks.
I.e. Your vocals are on a totally different audio file than your interviewees. This allows you to better isolate background noise, etc.
You can do this with about any recording software for Skype, Zoom, Zencastr, etc.
Last thing about podcast production in general:
“You just want to have it listenable.”
Think about the 80/20 rule.
What 20% of pre-recording setup and post-production editing can I do that will make up 80% of my show’s audio quality?
Here’s the precise answer to that:
- Grab an affordable dynamic mic (that helps cut background noise right off the bat)
- Record somewhere quiet (or use sound panels, etc)
- Remove background noise in post-production
- Level the audio in post-production
That’s it.
What hosting should I use for my podcast?
Here are Steve’s top recommendations:
1 – Libsyn
The industry leader for podcast hosting.
While their product seems to be great, I’ve never gone with them due to their pricing:
- $5/mo = only 50mb of uploads a month (that’s not a ton if you podcast for more than an hour or two a month) and no statistics.
- $15/mo = still only 250mb of uploads a month, and that’s more than I wanna pay.
See Podbean below for more on pricing.
2 – Blubrry
I worked with a client once who used Blubrry, and it was very straight-forward!
It also costs more for limited bandwidth.
3 – Podbean (what I use and recommend)
If I’m honest, the real reason I chose Podbean in the first place was that they had an unlimited upload plan at $110/year. That’s $9/month paid annually, $14 if you pay monthly.
But I don’t have to worry about podcasting too much (important given I prefer long-form content!).
I’ve been very happy w/ Podbean, and have no plans to switch anytime soon.
4 – Spreaker
I’ve never used them, and they’re a bit newer, but I hear great things.
The cool thing I hear is that they’re not just geared towards podcasting, but also live broadcasting, etc. Interesting stuff.
That’s really all a newbie podcaster might need to know. Want more? Here’s a free course:
This course is stupid simple–and covers the whole process (not just editing).
- Getting ideas for how you might stand out
- Connecting to iTunes, Spotify, etc
- Growing your audience in the first few weeks
- and more.
In fact, Steve Stewart actually has an entire course on editing (and more) that’s probably WAY more thorough than mine! Find it here.