In late December 2019, my family moved to Northern Michigan–and I finally had. my. own. office.
It was ammmmmazing to have my own little place to work (and store camera and podcasting gear lol)–but it was cramped, ugly, and NOT a comfortable place to spend 40 hours a week.
In March 2021, we bought a house and moved–and I inherited a sweet basement room to turn into my office!
This just-for-fun post details the renovation process, gear purchasing decisions for podcasting & YouTube, and other insights have found over creating a productive, comfortable, and happy workplace.
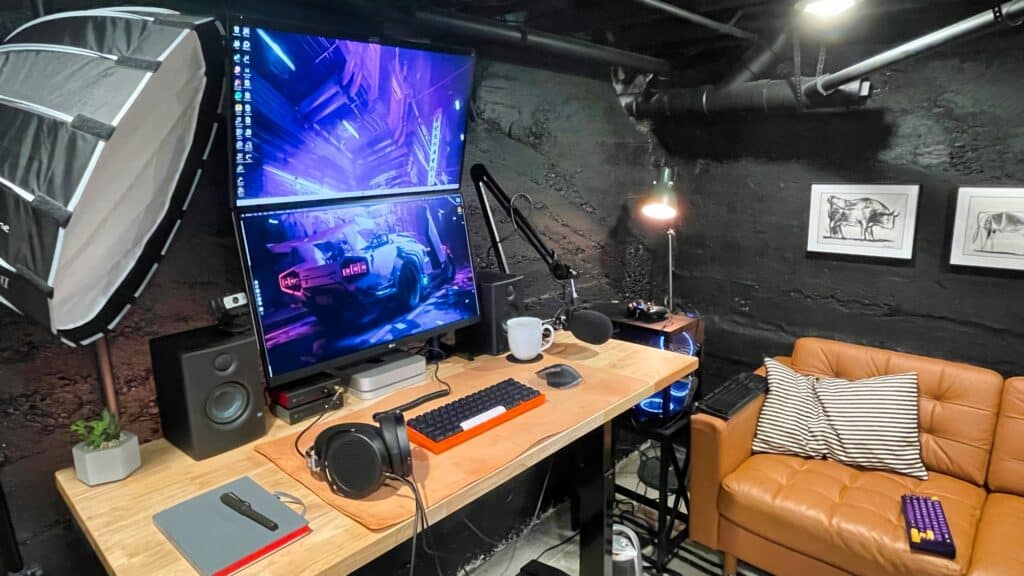
8.4.22 update: I’m mostly DONE and IN LOVE with my current setup. Final details below.
Furniture & Decor list
- Rug: Riordan Black/Ivory Rug on Wayfair 7’10” x 10
- Couch: Morabo from Ikea
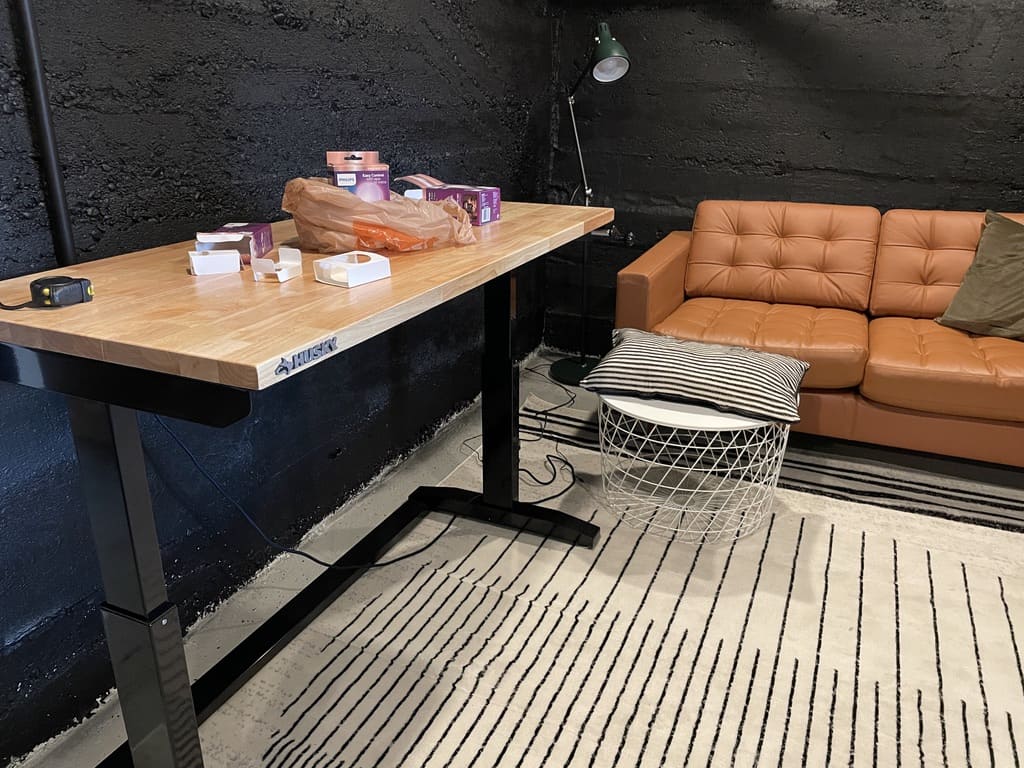
- Main Desk: Husky 52 in. Adjustable Height Work Table from Home Depot
- (Old) YouTube Desk: Gerton solid wood tabletop, sitting on some old Ikea drawers
- Floor lamp: ARÖD from Ikea
- Smart Lighting: All from home depot, these bulbs and string lighting are Philips brand (the Wiz app ones, not the Hue app ones)
- Rolling storage cart: RÅSKOG from Ikea
- Storage coffee table: KVISTBRO from Ikea
- Pouf! COTTON CRAFT – Hand Knitted Cable Style Tweed Dori Pouf – Charcoal/Black
Computer Workstation List
- Computer: 2016 15″ Macbook Pro, almost fully loaded
- Monitor: LG 27″ 4K UHD IPS Monitor
- Speakers (they’re actually monitors): Presonus Eris 3.5″ Near Field Studio Monitor (Pair)
- Keyboard: Keychron K2 Wireless Bluetooth/USB Wired Gaming Mechanical Keyboard, Blue Switches
- Mouse: Logitech MX Anywhere 2S Wireless Mouse (works on any surface. So good)
- Headphones: Hifiman Sundara
- Deskpad: FireBee felt pad, dark grey
- Vertical Laptop holder: OMOTON Double Desktop Stand Holder with Adjustable Dock
- Mount: WALI Extra Tall Single LCD Monitor Fully Adjustable Desk Mount
- Fountain Pen: TWSBI Diamond 580 (clear, bold nib) Wondering if fountain pens are better? Read this. YES, they are.
- Journal: Leuchhturm1917 (dotted)
PSST: I’ve been SUPER into mechanical keyboards. They’re literally life-changing! Wanna learn more? Check out this article: What is a mechanical keyboard? (and why are they better?)
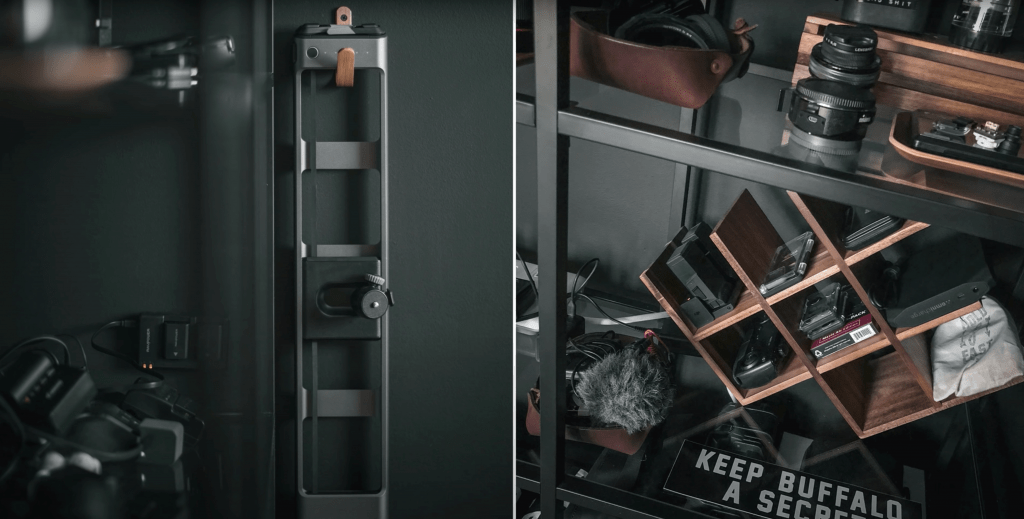
YouTube/Podcast Gear list
- Camera: Sony A6400 with Sigma 16mm lens (they make these for Canon’s as well)
- Podcast Mic: Either the Rode Podmic or Heil PR40, depending on my mood >_<
- YouTube Mic: Rode NTG4 shotgun mic
- Key light: Godox SL150 (soooo much cheaper than the Aperature equivalent, and just as good for my eyes)
- Light dome: Aperature Lightdome mini II – I needed this smaller version in my old office, but now I wish I had the big one lol
- Boom stand (for YouTube mic): Cheap one from Amazon
- Light stand (for key light): This Neweer one from Amazon
- Friction Arm (often used for main camera): Manfrotto Variable Friction Arm w/ camera mount with a Manfrotto 035RL Super Clamp
- Audio Interface: Behringer UMC202
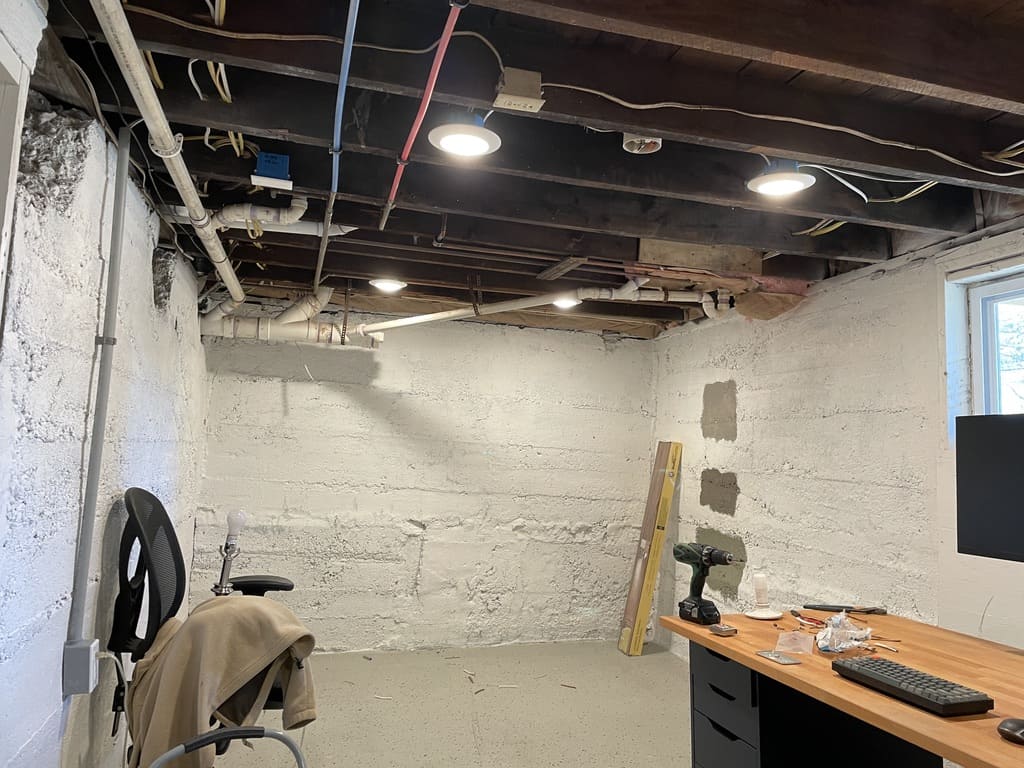
Phase 1 – The “Before”
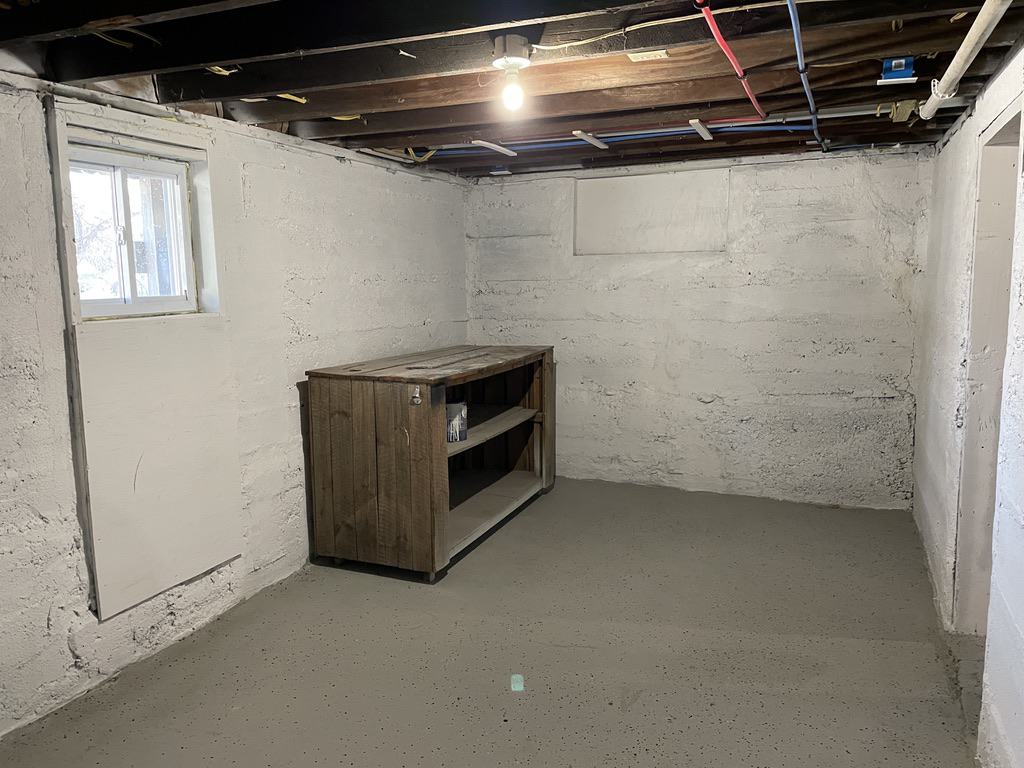
Ok, so here’s the basement room “before” status:
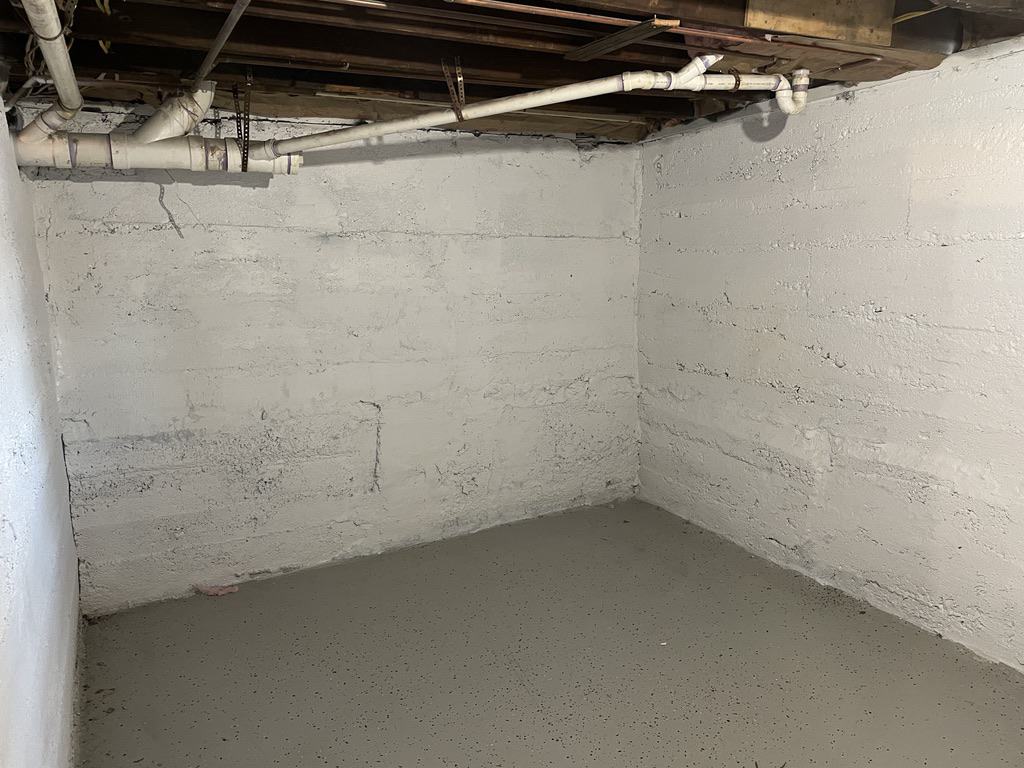
(Also, the seller left that huge wooden outdoor bar in there. It was almost really neat–almost. It ended up taking up WAY too much space, and it was filthy)
- Dimensions: 9ft by 18ft
- Walls: crazy concrete, recently painted with a sealer (which was a cool white color)
- Floor: Concrete, painted with some crazy flaky paint (by the seller)
- Ceiling: Unfinished, exposed floor joists with random wiring/pipes
There were 3 initial problems with this basement office…
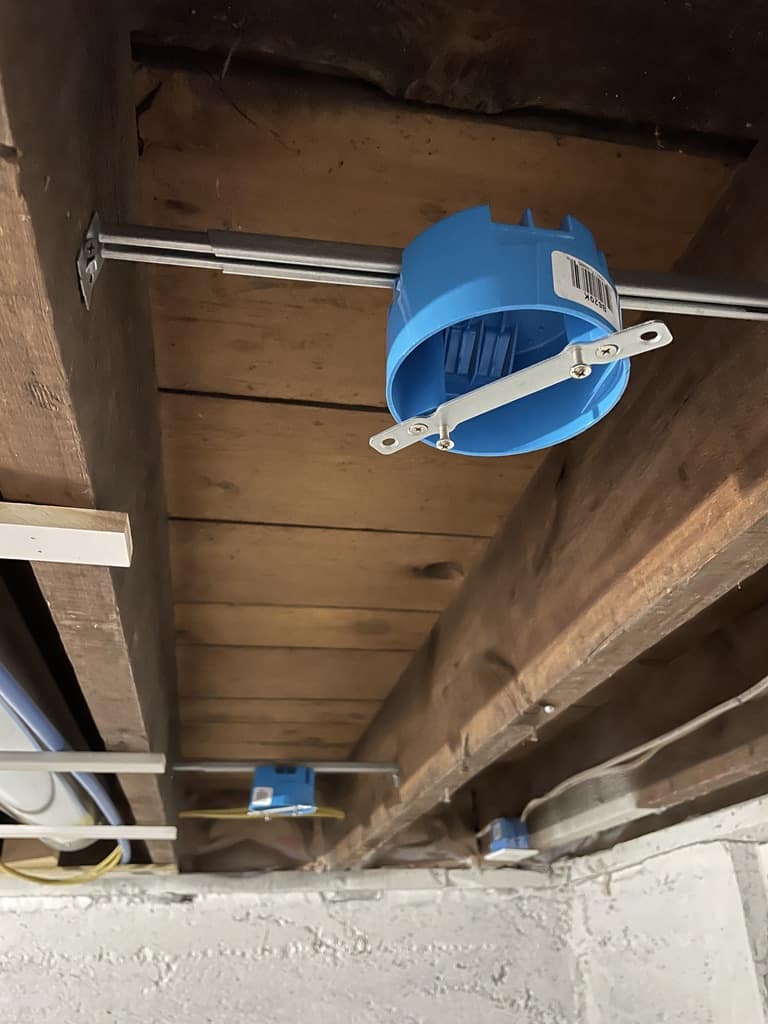
- There were no electrical outlets
- There was only one horrid light in the middle of the room
- It felt like a dungeon. Really cold. Stone. Ugly.
But hey, at least I have one tiny window (and it opens!)

Task 1 – Get power
I called an electrician, who came over and wired in 3 power outlets (with grey plastic conduit). Cost about $80 for parts and labor–I’d call that a S T E A L.
Task 2 – Fix lighting
Nevermind lighting for YouTube (I talk about that below)–but just having NORMAL, GOOD lighting can ABSOLUTELY, 1,000% change the look and feel of any room.
I initially thought I’d have to use lots of lamps, etc, and that recessed lighting would be a HUGE expense, or a HUGE pain.
I thought wrong.
As it turns out, Home Depot (and other places) make these sweet LED faux-recessed lights that can be hardwired into the electrical lines, OR simply plugged into a light socket. And they’re super cheap!

This is where Granddad DYEB came in to save day–he helped me mount the fixtures, and hardwired everything himself (so I could turn these on with the lightswitch).
They’re even dimmable!
THIS MADE A WORLD OF DIFFERENCE, IMMEDIATELY. It’s nuts how important lighting is.
Task 3 – Paint walls (and unfinished ceiling!)
Sooooo for the past several months–I was actually thinking that this office would have a light, natural, bohemian feel to it.
I mean, who doesn’t want a Pinterest-worthy office like these???
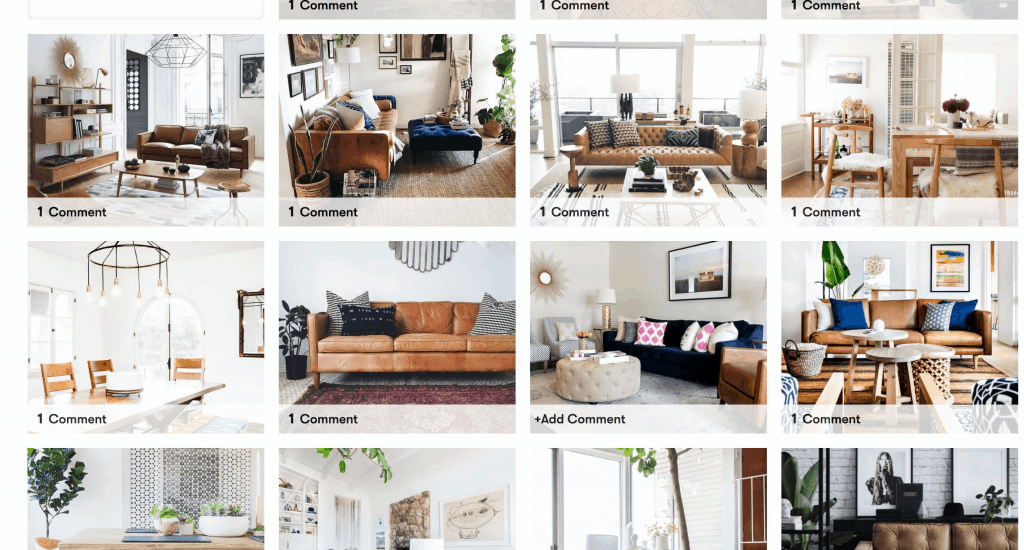
There were 2 reasons I opted to COMPLETELY change direction after dreaming about my light-filled-bohemian-office…
- It’s a damn concete basement
- There is SO LITTLE natural light
- GEAR. I have oodles and oodles of black metal, black plastic YouTube and podcasting gear, with cords everywhere.
Can you imagine one of those Pinteresty rooms with MASSIVE YouTube lighting, microphones and cords everywhere, etc? lol no.
But can darker rooms still be cool?
Especially with low-to-no natural light?
I threw on some initial dark brown/grey paint samples.
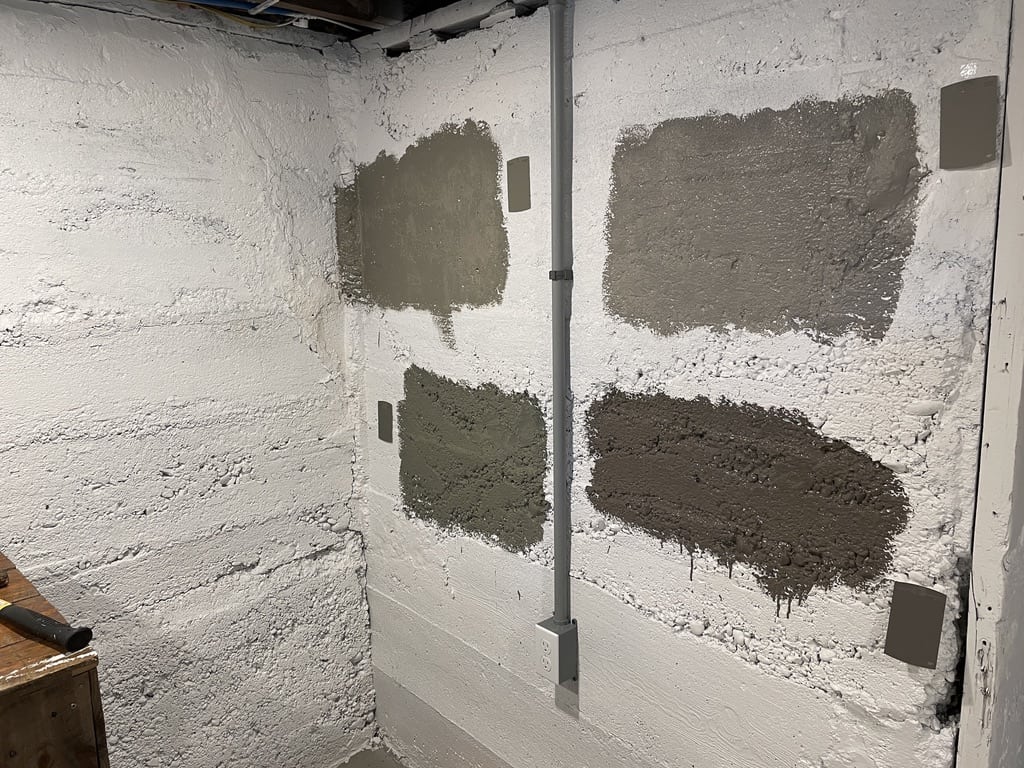
These did not feel good :/
At this point I did more Googling, Pinterest-ing, and YouTubing, trying desperately to find inspiration….which I eventually did!
Becky & Chris are fantastic YouTubers who talk a lot about home reno, interior design, etc–and they do dark colors REALLY, REALLY WELL.
I mean, I haven’t seen them do a concrete basement room–but maybe Matte Black would work for me??
90% of my wardrobe is either black or grey–and I also listen to Nine Inch Nails.
And now I want a matte black office? I’m apparently emo.
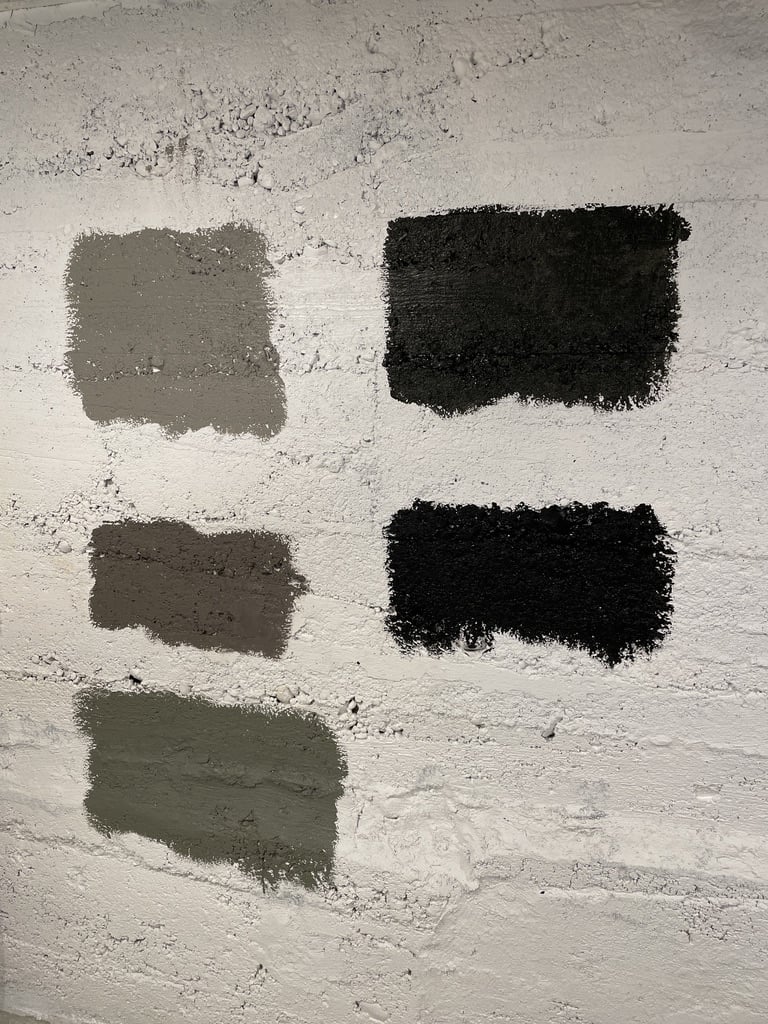
After much debate–I decided that black might actually fit the concrete basement feel a bit better than TRYING to replicate a light, bohemian, Pinterest look.
Plus, it’d hide the black gear soooooo much better.
Next steps:
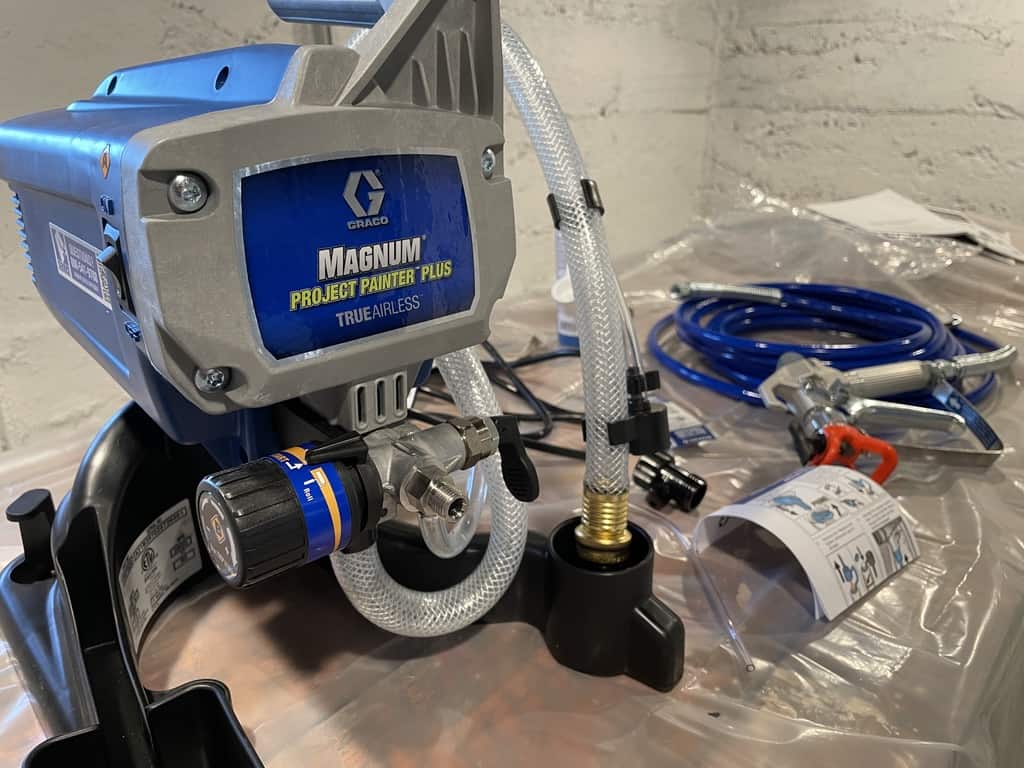
- Purchase a paint sprayer (I could’ve rented one, but that was like 45% of the purchase price just for one day, and I KNOW I’ll use this again. Also, I just really really wanted one. It was a BLAST.)
- Grab 3 gallons of Benjamin Moore Regal, Black, matte finish
- Buy more tarps, as I used 6-7 of them to cover everything.
- Lay down tarp, tape off new ceiling lights, outlets, etc.
- Buy a respirator mask on Amazon (a MUST-HAVE if you use a paint sprayer, especially indoors in a tiny room with no ventilation)
- Figure out how to use the sprayer, and then paint!
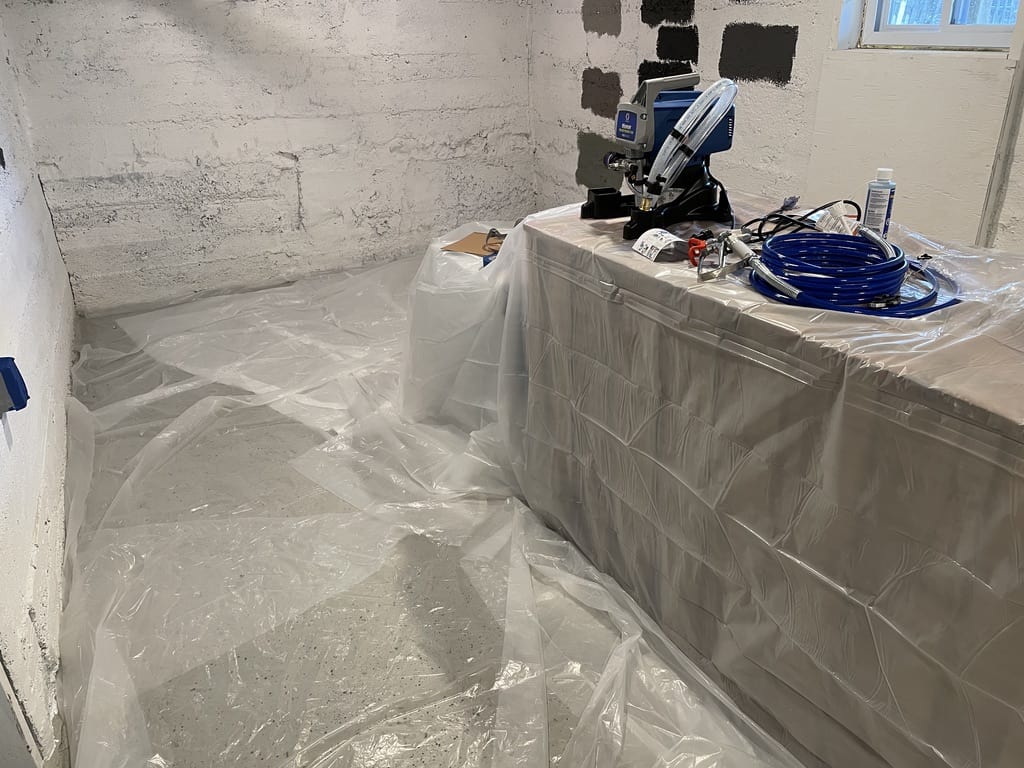

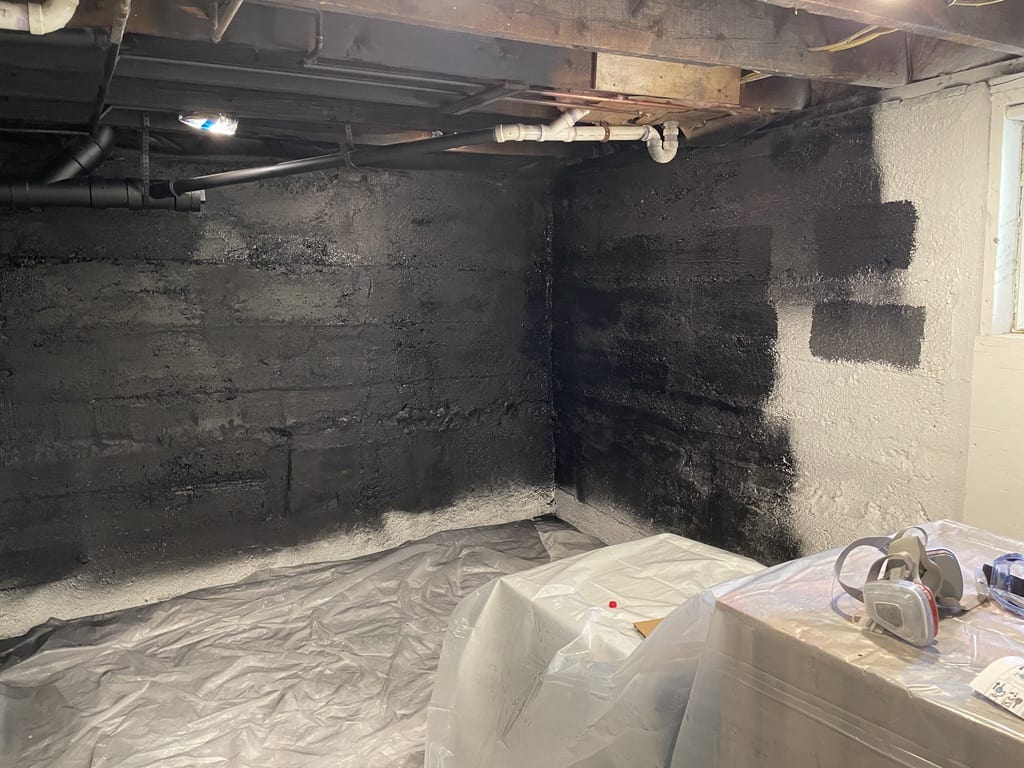
Pro Tip: Remember that wet paint is always a different color than dry paint. And a COMPLETED room will always feel different than a work-in-progress room.
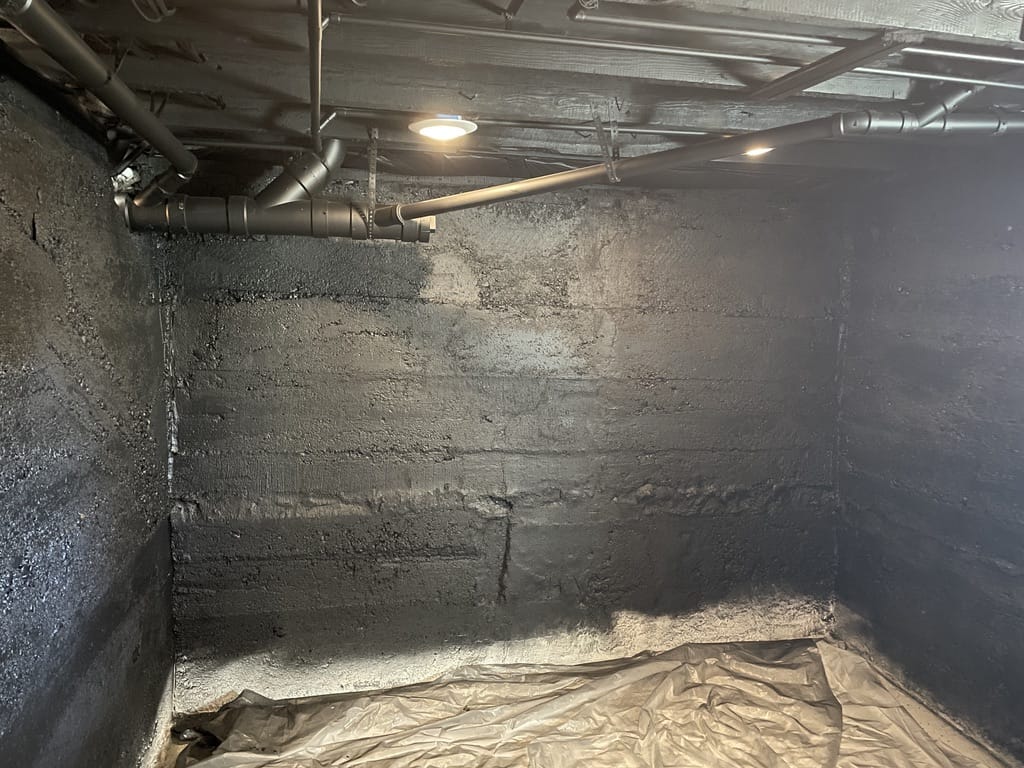
It took a few hours of work, another hour of clean-up (and showering omg), but then it was done!
It felt really good! Not slam-dunk great, but way better.
I am REALLY happy with how the unfinished ceiling and exposed pipes look. They look incredible with the matte black.
The next phase = outfitting the office (to make that black look a little less awkward lol)
Phase 2 = outfit the office
Soooo I also had lofty dreams of Pinterest-worthy, hearty, real, and EXPENSIVE furniture and decor.
I ditched that dream as well, and went back to my go-tos:
- Ikea
- Wayfair
- Amazon
The trick was searching for new furniture that would go with the black theme.
First, a new rug (on sale for $99 on Wayfair. It’s cheap, but I love the design and it feels great).
Next, Mrs. DYEB and I took a nice day-trip to Detroit (with no kids!!!), and went on a house-related shopping spree.

We FILLED my Ford Expedition to the brim lol.
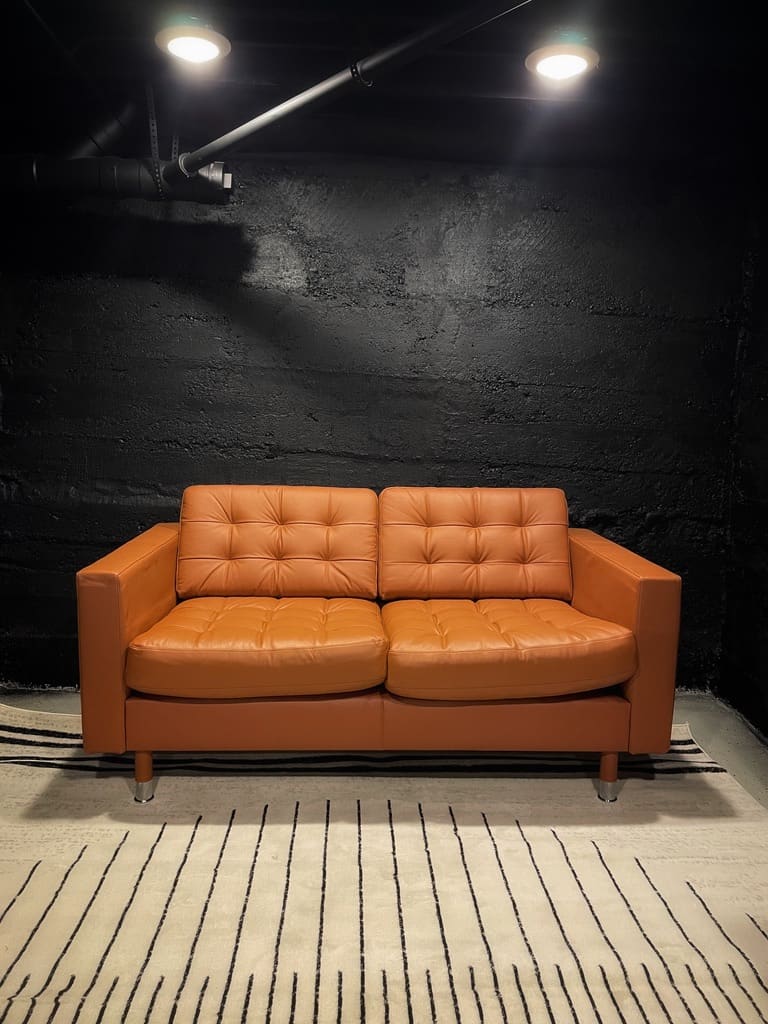
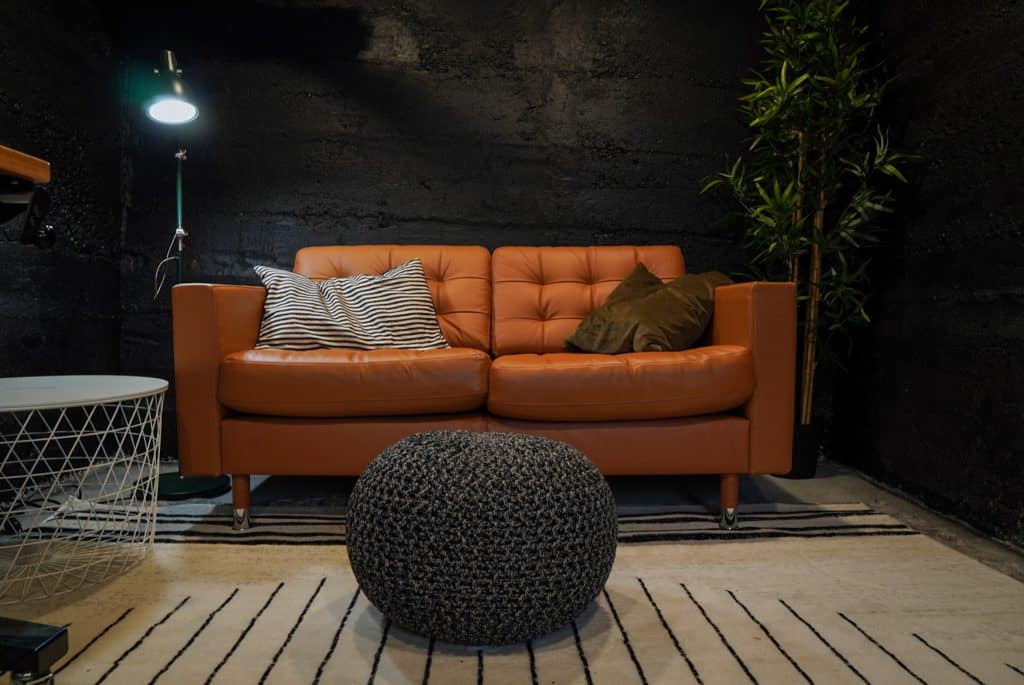
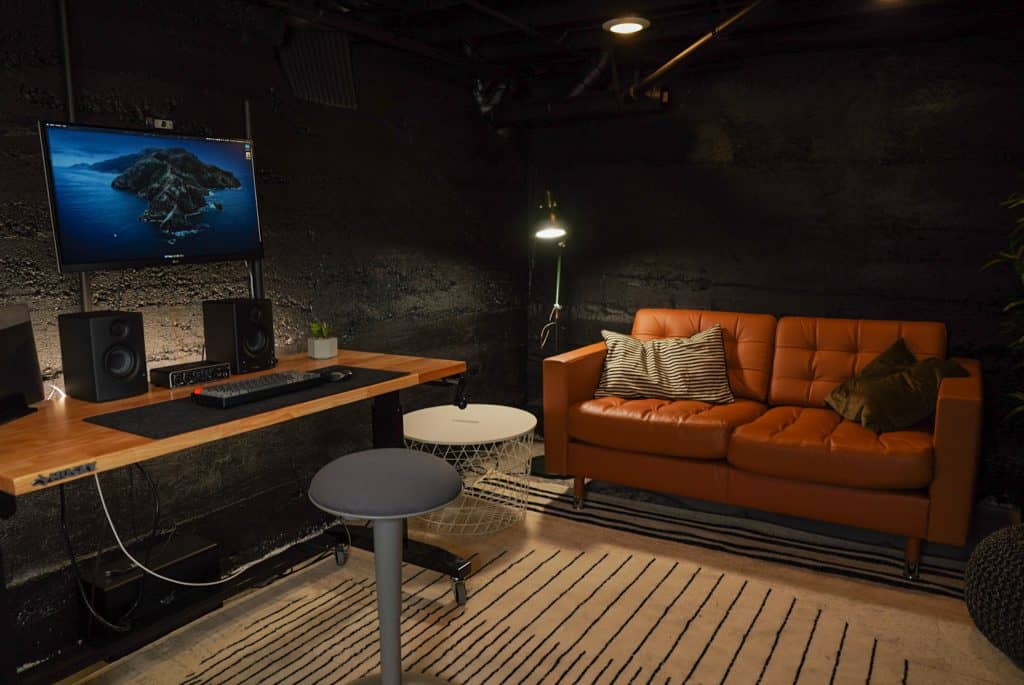
The biggest purchase was a sofa. I wanted a COMFY place to sit (and so others can come and sit in the office).
I’m a huge fan of the medium-toned leather (it does look a wee bit orange in that photo, but it’s closer to brown in real life).
A note on room layout and Feng Shui
This basement room is NOT laid out well for both Feng Shui and shooting YouTube videos lol.
(Btw – the only Feng Shui I actually care about is NOT having your back to the door. It feels so weird like that, better to be looking at the door from your desk).
But for shooting video, I wanted to have the only natural light working FOR me–so I wanted the window to the side of my desk.
Soooo what to do?
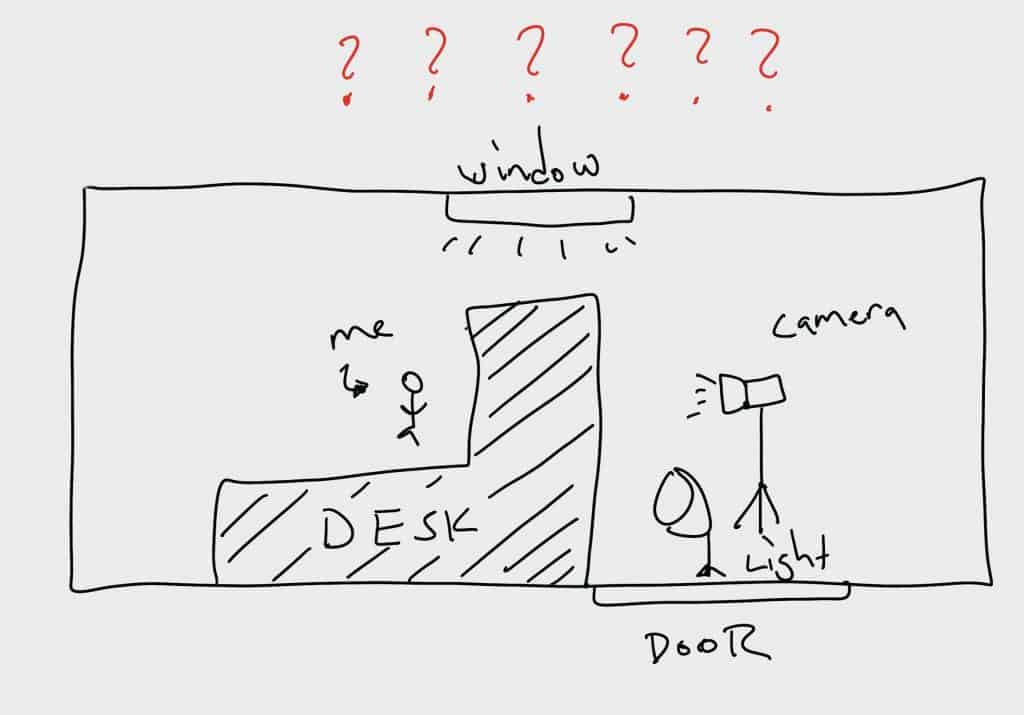
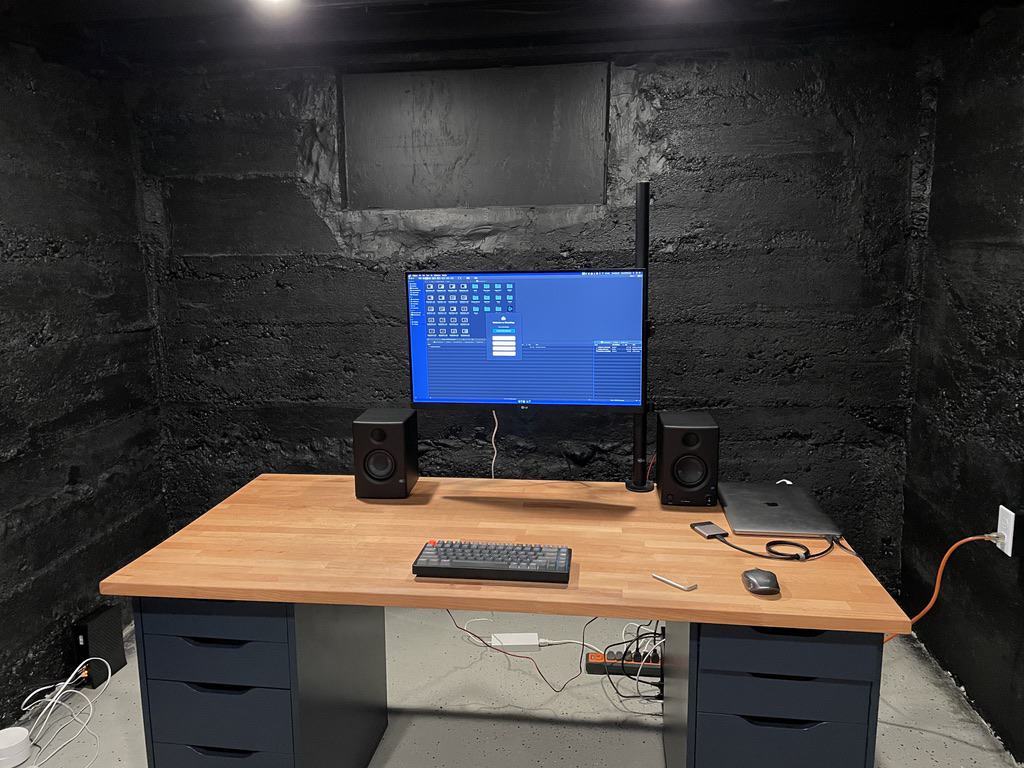
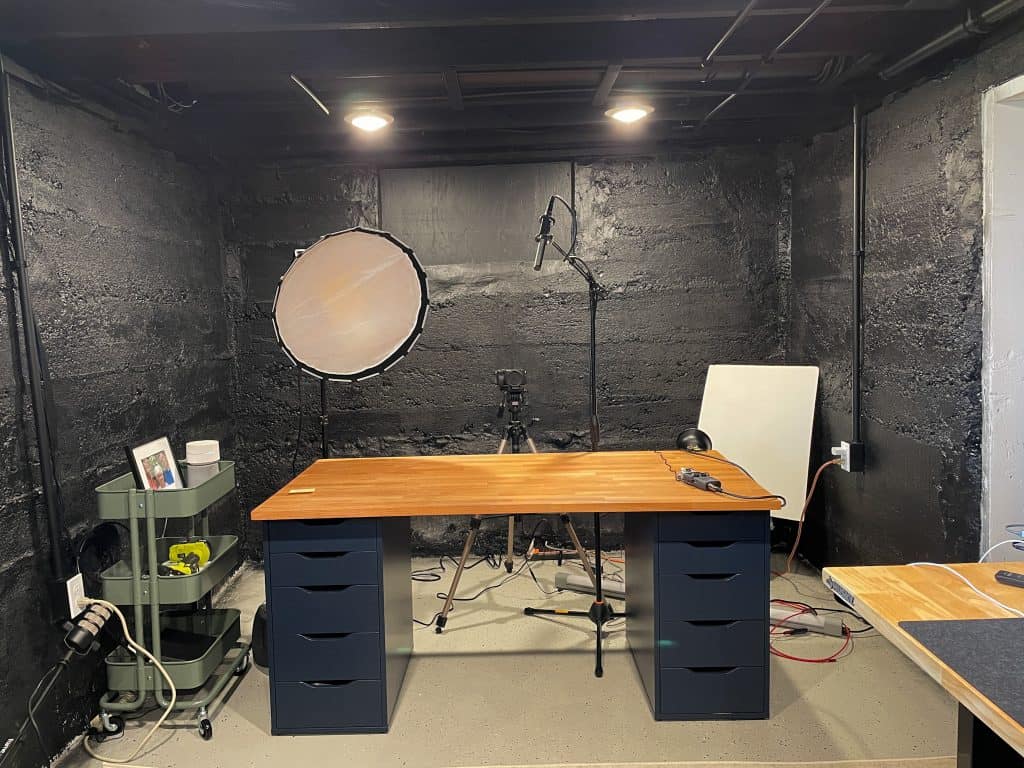
After much debate, and with help from my wife, I opted for a 2 desk approach and picked up a Husky standing workbench from Home Depot ($200, probably the most affordable and simple standing desk you can get.)
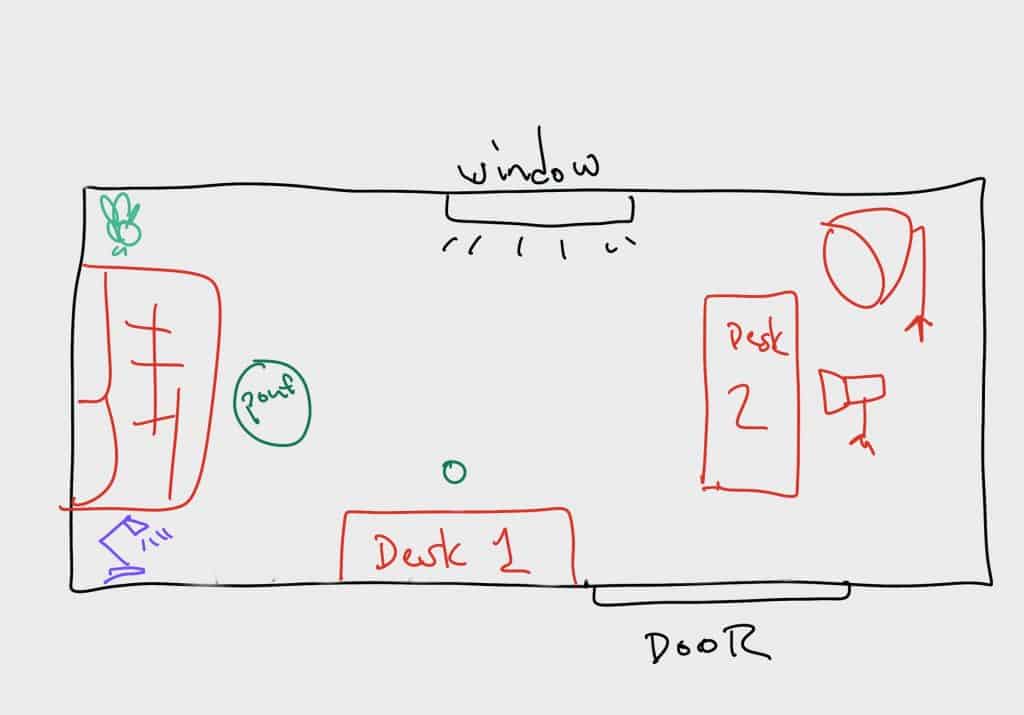
I’m STILL not convinced I’ll keep this layout forever (I doubt it, actually), but for now it does a few things.
- Makes good use of space. I LIKE having a bit of emptiness just next to where I sit at my computer. I don’t like feeling cramped.
- On the other hand, the YouTube desk is NOT against the wall (which I require to have camera, lighting, and mics set up anyways)
- I get to face the door when I’m at my main desk
- The window light works for shooting video (though it’s still behind me when I’m at the YouTube desk. It balances out the shot and illuminates the room just enough)
The only real downside to the current layout is that the window light is DIRECTLY behind me when at my main desk (for Zoom calls, podcast recordings, etc.) Looks really bad.
Here’s the current “left side of the room,” complete with my new pouf as well (I’ve always wanted one of these lol.)
2 more reasons this setup works well:
- I want to shoot videos down the length of the room for more depth of field. (a must for any great YouTube backdrop)
- I like NOT shooting videos at my main computer desk. I love having a specific spot for video!
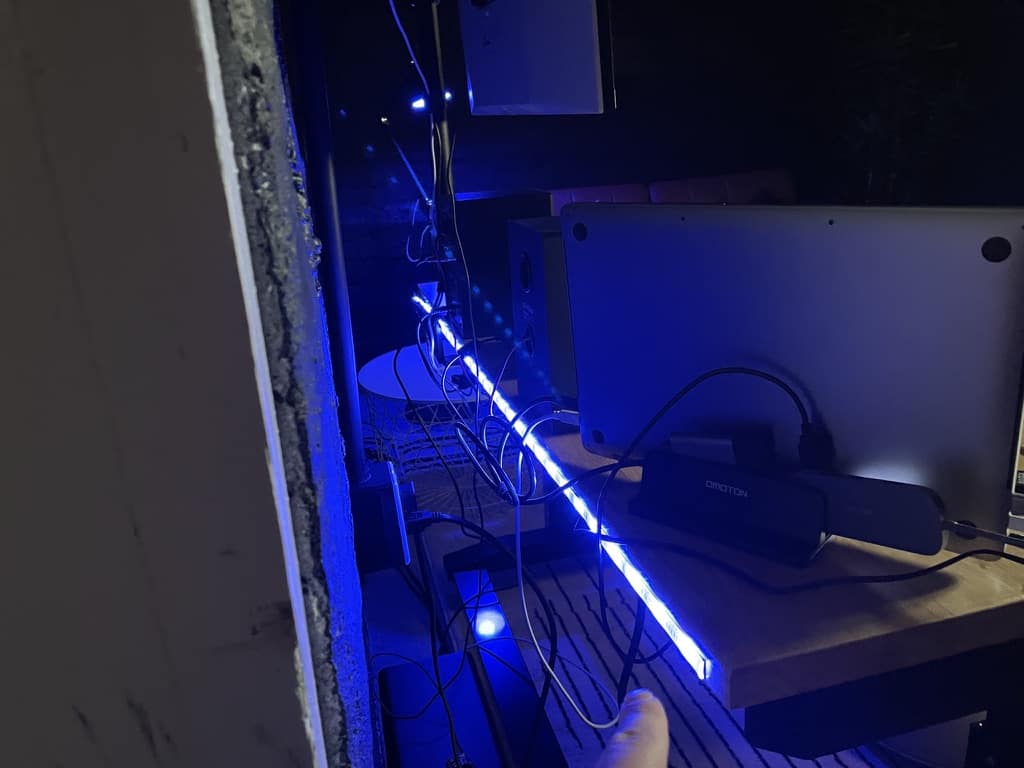
Lighting!
While the recessed lighting is 100x better than the single bulb in the middle of a small room–I also wanted accent lighting for videos (and to feel comfy).
I ended up splurging a few bucks extra for smart lighting.
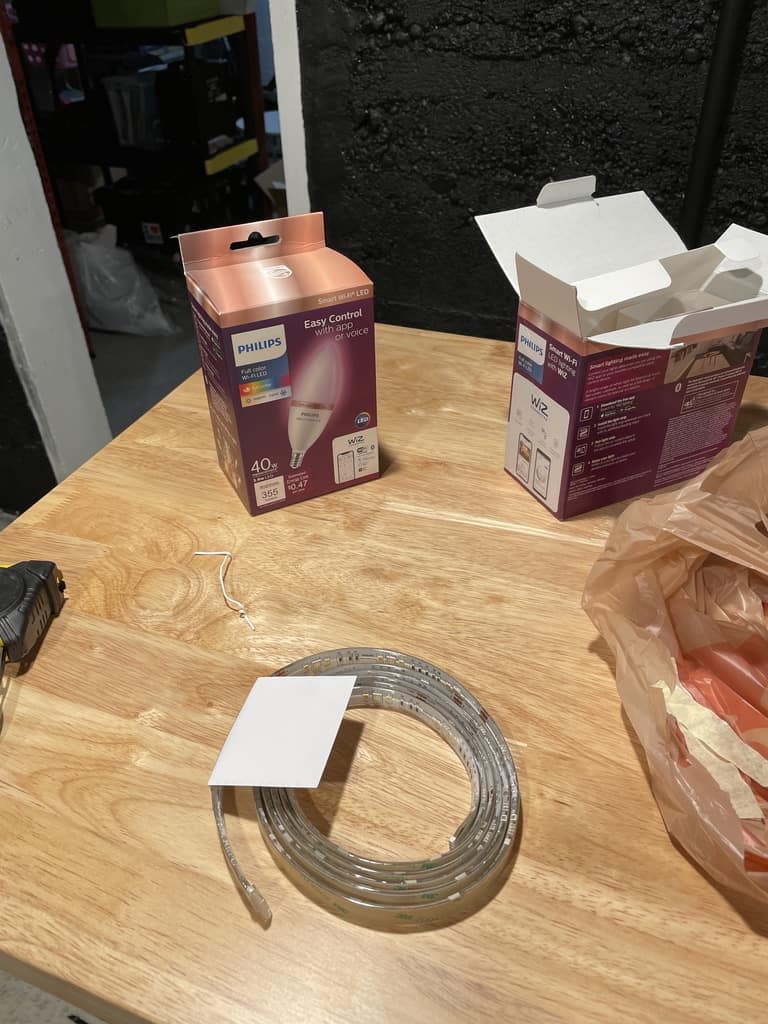
I got 2 full RBG bulbs, as well as some string lighting to mount to the back of my main desk!

So for video…
- Key light = the big Godox SL150 with Aperature lightdome mini II.
- Fill light = small mountable lamp above (from Ikea), with smart lighting to make any color/temperature I want, bounced off a $1 white foam board from Wal-Mart
- Background lighting = the string light on the back of the desk, and an Ikea floor lamp
- Also, the window = lights up the room, and I can always cover it with curtains (I got a super cheap black blackout curtain from Meijer, and just hang it up with 2 clamps).
Here’s a shot from the first YouTube video I recorded:

Phase 3 – Decor & Feel
Truth be told, this is the phase I’m currently in as of April 2021!
- I need wall art. I have zero.
- I need a small bookcase (I’m thinking a long n’ short TV stand actually) to put on the wall under the window.
- I need a bit of soundproofing done.
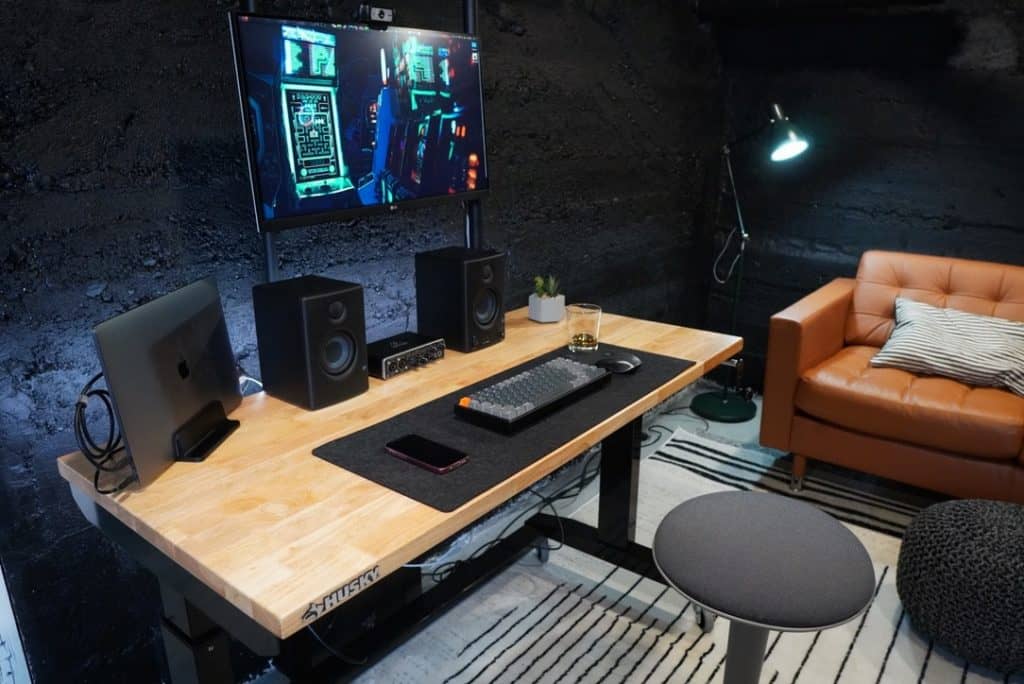
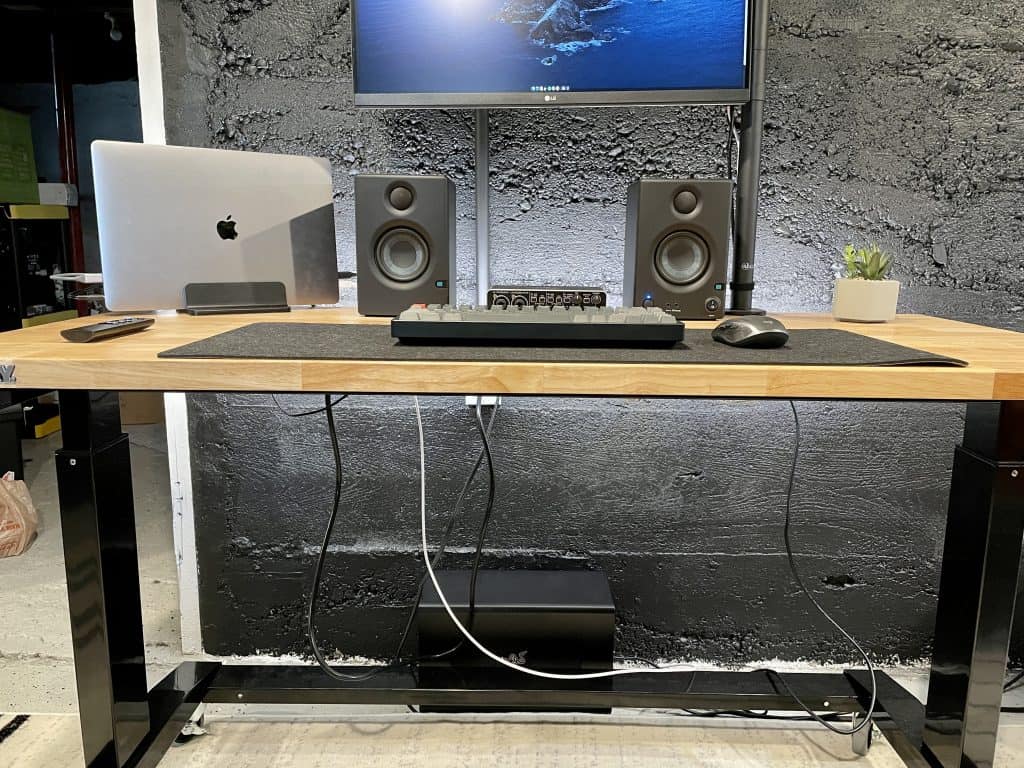
What I HAVE mostly done is get my main workstation the way I want it, completely with a desk pad, fake plant, and vertical laptop stand!
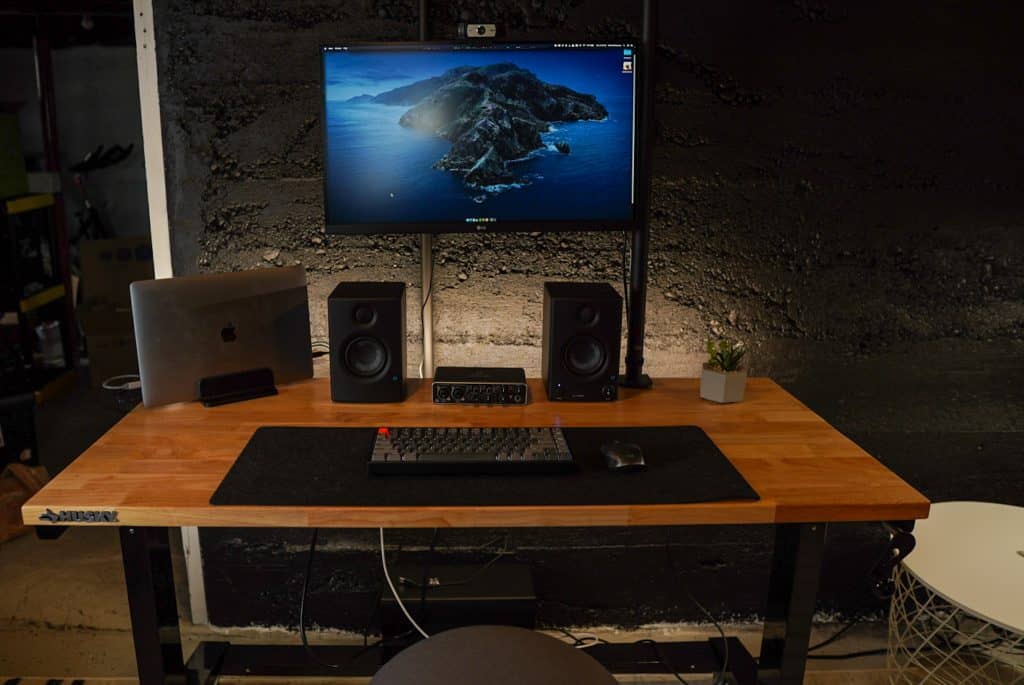
Also, it’s worth noting I’ve done a bit of cord management as well.
Note the mechanical keyboard…
I’m officially obsessed at this point (and I use different keyboards for work and gaming (Mac and PC)) lol.
I wrote up a guide to the best gaming keyboards here, so go read that, too!
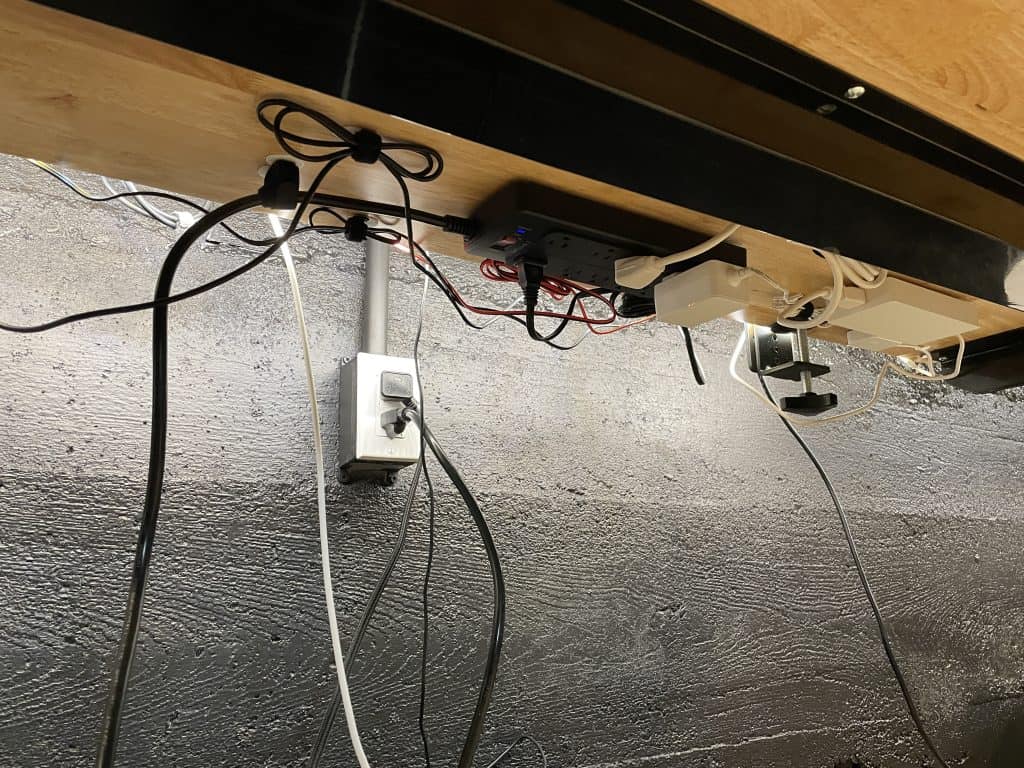
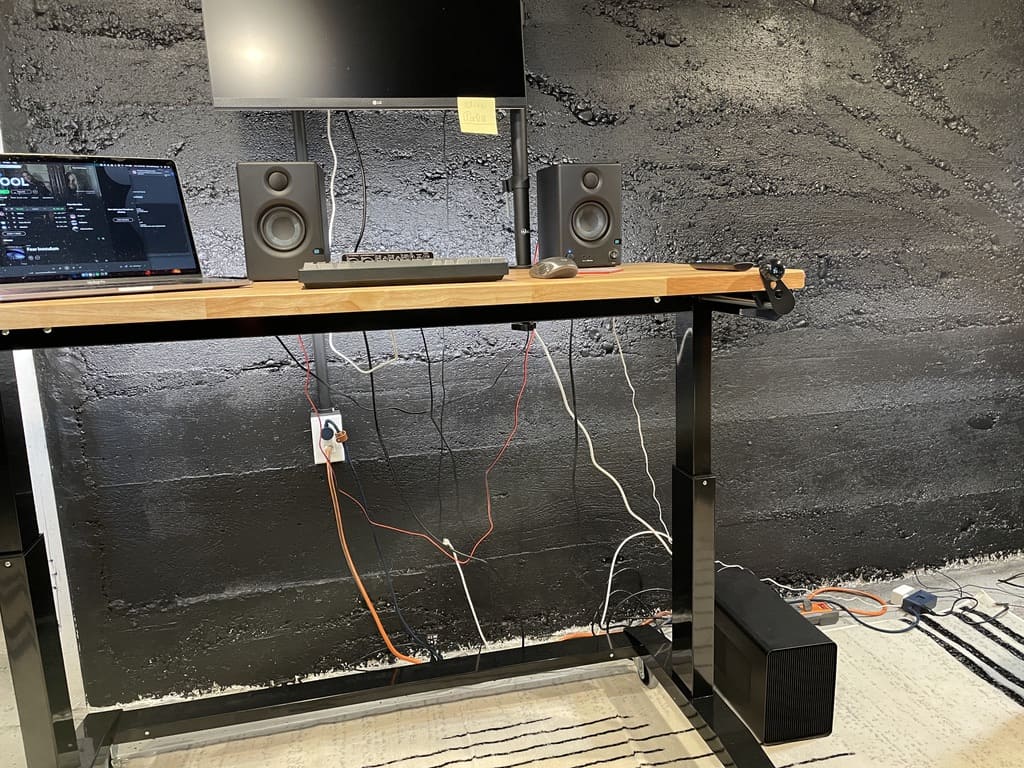
FYI – I mounted all that stuff underneath the desk with cheap velcro strips from Home Depot. It was surprisingly fun, but I still have 2-3 more cables to figure out.
What’s next:
- slowly add wall art! Looking for maybe a print of Picasso’s “The Bull”, or other black-n-white (with a white background) pictures/prints
- Find a low, shallow, but long TV stand to use under the window (for storage and decor)
- Find a good way to quickly hang up moving blankets and/or sound-absorbing curtains when I want to record
- Keep playing with the lighting setup to get it dialed in 🙂
Over to you for the comments, what do you think?
What kind of wall art should I get? How could I make it more comfy and cool?